How to Storyboard

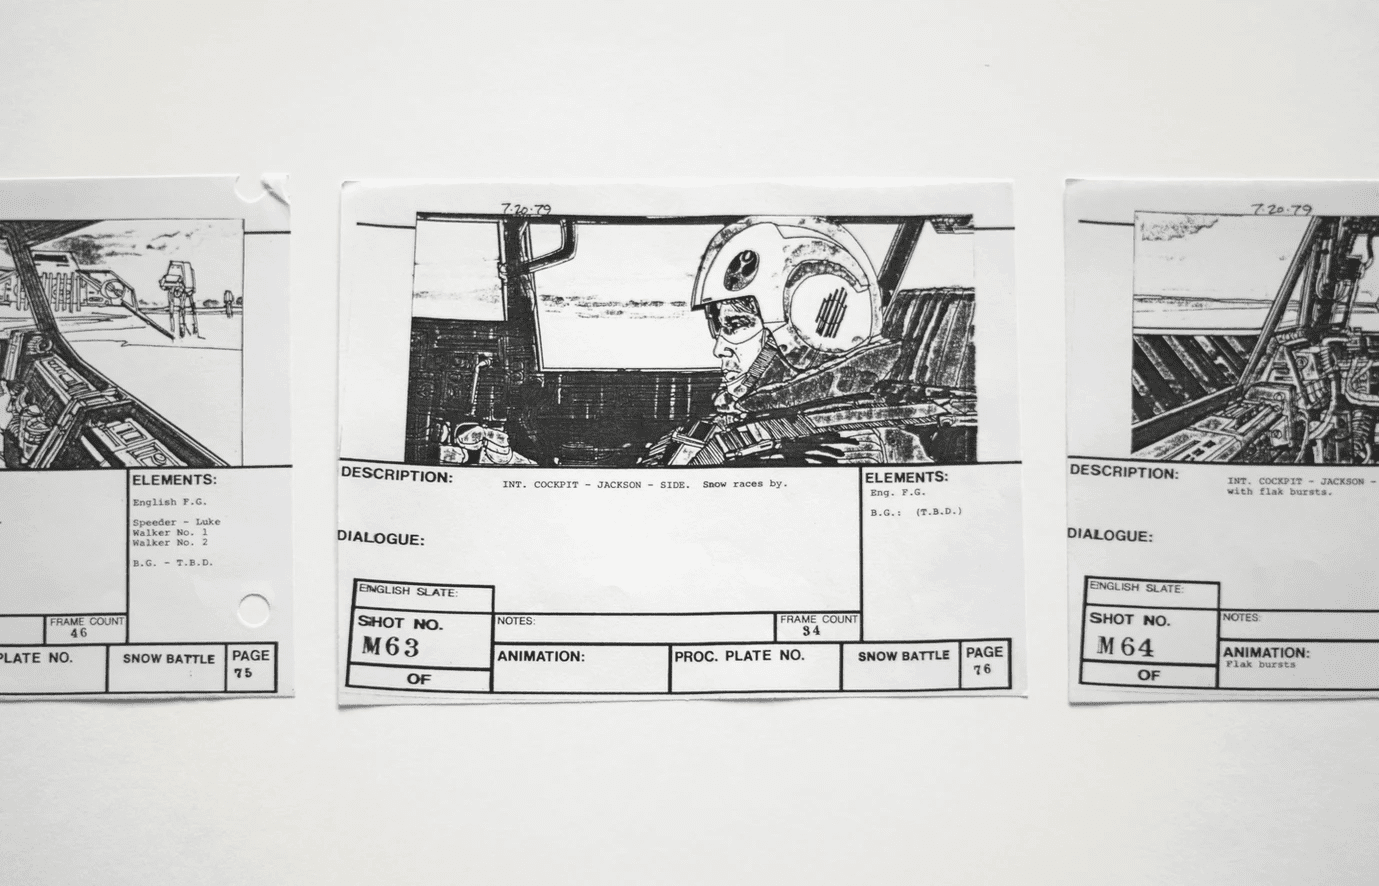
Learning how to storyboard is a useful communication technique. These visual representations help you organize your ideas, account for transitions, and communicate with others. Learn how to storyboard in this article to get started. If you don’t know how to create a storyboard, follow along with the links at the bottom of this article. You’ll be amazed at the power of storyboarding! After all, you’re making a movie, so why not share it with everyone who will see it?
Storyboards are a communication tool
A storyboard is a visual representation of a user story or scenario. The top of the storyboard specifies a role or persona that corresponds to the story. Below the character is a short text description of the scenario. It should be simple enough for team members and stakeholders to follow. After all, they try to understand what is happening in the story. When creating a storyboard, there are many important points to consider.
Storyboards come in many flavors, with the main ingredients being text and images. However, most designers recommend beginning with a low-tech approach, such as a whiteboard, as it allows you to make changes quickly. You may also want to include pictures of actual screens or users using the product. In either case, make sure to leave enough room to add text and images that accompany the story. If you have a storyboard, you can use it to communicate the idea of the product or service to the audience.
They help you organize your thoughts
Storyboards are a helpful way to plan a presentation. Once you’ve gathered your main ideas, create a simple sketch to represent each one. If you’re doing it by hand, it’s best to use a pencil as a guide, but sticky notes are also effective. Sticky notes are more flexible than pencils, and they allow you to make changes to each storyboard as necessary.
Storyboards can be created on paper or computer software, including many apps that allow you to use a video camera to record a scene. They’re a useful way to visualize your ideas and save time and resources. You can also use them to interview people for a documentary and record interviews using a smartphone. Make sure to leave room between each pair of storyboards, so you can easily swap them out if necessary.
They allow you to account for transitions
The storyboard allows you to account for transitions during your editing process. The more detail you include, the easier it will be for the production team to complete the job. Additionally, it gives you more control over the final product. For example, by using them for your project, you’ll be able to account for the transitions that happen during various parts of your story. You can also use them to account for color. By using color in your production, you’ll be able to showcase the visual style you’re trying to portray.
Storyboards can be helpful to UX experts in many ways. They help focus software design on the user and minimize distracting details. There are several downsides to storyboard tools, however. Indigo Studio is one tool that’s been designed to address these issues. It also offers rapid prototyping and wireframing. However, if you’re using a storyboard tool for your project, it is important to know how to use it.
They can be shared with others
If you’d like to share your Storyboard with other users, the first step is to make sure it’s not already shared. To share it with other users, you can go to the Storyboard Library and click on the “3 dots” menu on the upper right-hand corner of the Storyboard. Once you’ve made a storyboard, you can also send the link to other users via email. You can also choose to make the Storyboard private or public.
If you want to share your storyboards with others, check your work with your product team and stakeholders to ensure that it represents the shared vision of the scenario and how scenes progress. They can be used both internally and externally, as they don’t contain any personal information about members of the public. This is a benefit that should not be underestimated! And since you can share your Storyboards with others, they’re great for sharing with stakeholders and presenting the story to the team.
Want to Work With Austin Visuals to Build Your Explainer Videos?
Send us a message or call if you are interested in getting started on a great-looking custom explainer video now.


