Our Animation Process at Austin Visuals 3D Animation Studio.
Thank you for your interest in Animation with Austin Visuals!
We hope you will explore the potential of working with Austin Visuals by completing an online request for a quote.
This document was created in order to help our clients appreciate the service we provide, help clients better collaborate with us, and helps us manage our client’s expectations throughout the 3D or 2D Animation process. If you are reading this document, you are probably considering creating an animation for your business needs. Are you creating a film and need FX? thinking of a commercial for your business? Are you in need of describing a complex process visually such as Engineering, Architectural projects, or inventions? Whatever your animation needs, this document is intended to give you a walk-through of the process we use to create your animation or graphics. With the knowledge contained in this document, you can make more informed decisions during each phase of your project to ensure the project’s complete success.
Our Process
How do we do it? Brilliantly, of course! But you’re probably wondering just how we go about bringing your story and ideas to life.
Our Team at Austin Visuals 3D Animation Studio feels it is very important to educate our clients on what exactly goes on behind the scenes in a 3D or 2D Animated Production. This knowledge will not only explain how we do what we do, but it also helps our clients appreciate the service we provide, helps clients better collaborate with us and helps us manage our client’s expectations throughout the 3D or 2D Animation process.
For this purpose, we are about to walk you through how Animation is created at Austin Visuals 3D Animation Studio. So get prepared for a fun journey through our process…
As one of Austin, TX’s Premier 3D Animation Companies, we serve our clients locally and globally. Established in 2007, Austin Visuals has produced many Animated Commercials, Cartoons for YouTube, Architectural Animation, Visualizations for the Oil and Gas Industry, and Animation for The University of Texas (UT, Austin, TX), and even Animation and Graphics for NASA.
______________________________________________________________________________________________________
Our 3D Animation Production Process
Step 1: What are your needs?
Step 2: Concept and Storyboards
Step 3: 3D Modeling
Step 4: Texturing
Step 5: Rigging
Step 6: Animation
Step 7: Lighting
Step 8: Camera Setting
Step 9: Rendering
Step 10: Compositing and Special Effects
Step 11: Music and Foley
Step 12: Editing and Final Output
Do it in 2D? Or 3D?
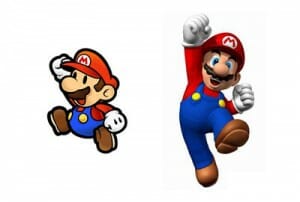
The first step for our clients to consider is whether a 2D or a 3D animation would be best for their purposes. Many of the steps are similar, but 3D is obviously complex and requires much more time to create than 2D in most cases. Although you can get much more visual depth with 3D Animation, 2D Animation often conveys a story, idea, or concept much faster. Just because 2D Animation is faster to create, doesn’t mean it’s the best choice to solve your visual communication needs. At Austin Visuals, we help our clients pick which kind of Animation is best for their needs. Maybe you’re looking for an Animation that will get your point across quickly, hold your audience’s attention, and entertain them visually? If you are then a 2D Animation might be the way to go. 2D is limited in the amount of detail it can show, and the amount angles or perspectives you can view your work from. 3D Animation; however, can do everything that 2D can do, and a whole lot more. 3D Animation can look very realistic like a photograph and allows you to more easily incorporate live-action video footage to give your project a more film or television commercial look. Combining 3d Animation with video shot with a Video Camera can be very helpful when adding special effects like explosions or demonstrating an industrial or mechanical process through use of 3D animation. 3D can also accurately show scale, volume, shadows, and light which is much more difficult than with 2D Animation. One thing to keep in mind with 2D Animation is that a 2D cannot always be converted to 3D easily, so Austin Visuals always recommends to plan for what you want from the beginning so that your project easily develops from phase to phase until your final delivery is achieved.
What is 3D Animation?
In a nutshell, 3D Animation is the art of “sculpting” digital objects and setting those objects into motion. 3D Animation is an important visualization tool that is helping a variety of industries, businesses, and individuals communicate visually. Instead of building physical objects in the real world and setting those objects into motion on film, we create 3D Animation by starting from nothing and use our minds, imaginations, and our team’s collective experience to produce things that move, live, and breathe using special 3D Computer Software to generate cutting edge state-of-the-art computer graphics. Our motto is, “We bring your ideas to life.” And that’s exactly what we do to bring 3D Animation to the web, television, or the silver screen. 3D Animation is a complex process that requires teams of highly skilled artists and trained experts in the field of Animation to work on an successfully execute your project. A typical 3D Animated Production requires the collaboration of Project Managers, Administrative Teams, Artists, Graphic Designers, Illustrators, Voice over Actors and Actresses, and other skilled Artists in order to get the best results.
What are kinds of things you can do with 3D Animation? It can visually communicate almost any idea you want. Whether you are attempting to show a prototype to the public, simple illustration to communicate your ideas, or even if we don’t have the blueprints for your design but you have an idea of what you want the end visual result to look like, 3D Animation is going to be your best choice for your needs in these cases. Our clients can even tell us over the phone what they want or write us an email and we can make fantastic 3D Animation for them based on limited information. If the goal is to make an Animation for purely entertainment purposes, we always say here at our Studio that we can do anything from making pigs fly to making a cow jump over the moon. We can make Animation look like an illustrated cartoon or we can make it look ultra realistic like it was a scene in a movie or from a photograph. We can pretty much do anything that you have visual reference for or that you can dream up.
With that in mind, let’s walk through the steps of Austin Visuals’s typical 3D Animation Production Process. At the end, we’ll cover the special cases of 2D Animation, Architectural Still Renderings and Animations, and Web and Mobile Commercials & Explainer Video Animations.
Our 3D Animation Production Process
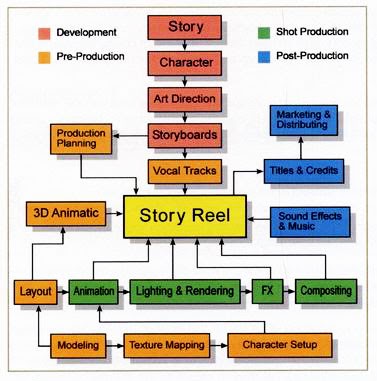
Here’s a quick overview of the entire Animation Production Process. The Animation process is broken up into 4 major phases which are :
1. Development
2. Pre-Production
3. Shot Production
4. Post-Production
In the development phase, our clients refine their message or ideas at this phase until what they want to communicate to their audience becomes very clear and to the point. During this phase both Austin Visuals and our clients work at coming up with a “blueprint” of what the Animation should look like before any major Animation work begins. Pre-Production is where we start to see our first visuals created based on the development phase. Shot Production is the phase where most of the good looking animation you’re used to seeing on television or film gets created. Once our clients get to the Shot Production Phase, the resulting Animation delivered to our clients is often around 80% of what the final product will look like. Post-Production is known as the last phase where any loose ends are tied up or anything that didn’t happen correctly in the earlier phases can often be cleaned up here. Small details can be corrected in this phase, cutting scenes out that aren’t needed happen here as well as adding text overlays and finishing touches on music and sound effects. Even though this process has many steps and phases of development, you can see that the best Animation created on the market today always starts with a carefully planned story or idea. All of these phases and steps are necessary in order to produce a high quality final product that is delivered on-time and is a final product that speaks to your audience.
Step 1 – What are your needs?

This is the step where you the client get to be a movie producer, and this step is almost always the first step for all of our animations no matter what kind of business you do with us. Our product is your vision. We want to make you happy, and we have a team of experts that exist to help you bring your ideas to life. Whether it’s for the trade show, for investors, the courtroom, or even entertaining the kiddos, our team of experts need as much information as you can tell us to make sure that we create the idea and vision that is in your head. Here, it’s important for us to gather as much information as possible about what you want your Animation to look like as a final product. This is where we get a lot of reference material from you. Do you have any images or YouTube links that are similar to what you want us to produce for you? What is the purpose of this Animation? Is it instructional, informative, entertaining, etc.? What is the visual style of this Animation?
Should it look like an illustrated cartoon when it’s done or should it look real, like a photograph? What is the mood, and the tone? Where will it be displayed after we are finished delivering our Animated Video to you? If the production is narrated, what should the narrator’s voice sound like? Do you want a Male or a Female voice, etc…? We may ask you a lot more questions than these in this first step of the Animation Process, but this is done just to get a clear understanding of what our Client is requesting and what they expect of our Animation Studio to deliver to them as a final product.
Don’t worry if this is your first Animation project, we know the kinds of questions to ask at this step to ensure that your production is a Blockbuster!
Step 2 – Concept and Storyboards

Here’s where we take your ideas for an Animation and translate them into a visual “sketch” or Storyboard. A storyboard is a sequence of illustrations or sketches that summarize your ideas and stories all in one place. A storyboard can be thought as a “blueprint” for how you want your animation to look. We also take doodles you’ve made on napkins, or clips from YouTube, along with any and all material you provide us as reference material for creating our storyboards. Each storyboard tells the story of what’s going on scene-by-scene. Also included are notes about music, a script of what is being said if anything, and how all of these elements relate to each other in order to provide you with the most cohesive and compelling story possible. This stage is known as the ‘planning and development’ stage and is a crucial part of the animation process as it helps you to visualize the project and map it out before we begin production.
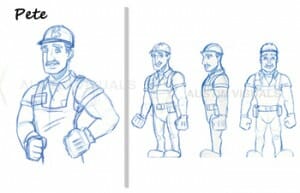
As for Character Design, if you need a Character developed for your story, we develop sketches usually in this phase. With a Character Design Sketch, Austin Visuals can show you different viewing angles and emotions of your character. Making changes to the way any character looks or acts is best done at this stage because sketches can be re-sketched much more quickly and efficiently than making a change once this character becomes 3D.
Step 3 – 3D Modeling

Now we’re rolling. We’ve got the vision. We’ve got the storyboards. It’s time to start creating your world in three dimensions. We use state-of-art 3D Computer Software to create each character or object that you will ultimately see in your final animation or still image. 3D objects in our world usually start as basic shape, such as a three-dimensional cube or sphere. We often like to refer to these as digital “putty”. Since we are artists, we like to sculpt things in much the same way a potter would create a pot from a lump of clay. At this stage in our process, we “sculpt” our digital putty, by pushing and pulling it into the shape it should be, whether it’s a robotic arm, a car, or a person’s head. This isn’t as easy as it sounds, though. 3D Modeling is a time consuming process in which we create the characters, sets, and props, often times we will creating things “out of thin air” when need, but showing us reference always helps us create faster and create a project that is more precisely what’s in your head.
Step 4 – Texturing

Here’s where it really starts to get interesting. Texturing is the process of adding color to our digital putty or 3D models. Do you want the image to look like a photograph? Should we incorporate the colors from your corporate logo? We’ll start with a rough draft for you to review, then we’ll add details into your model such as simulated textures, scratches, or shadows. A model that looks like a photograph might require as many as 22 layers of texture to get things just right! Know that we only create detail where and when needed so that we are always efficient with our time and resources.
Step 5 – Rigging

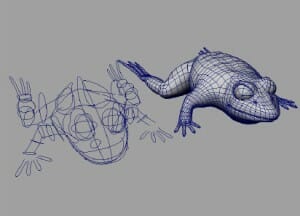
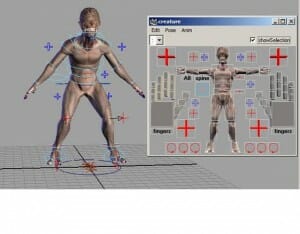
Rigging is the last step before Animation. Each rigging is unique to each object in your production. Our team of animators will digitally manipulate the skeleton depending on the the desired motion. Obviously, the more complicated the motions are, the more complicated the rigging will be and the longer it will take to animate. For example, hands moving on the face of a clock or a car sliding through an intersection will require considerably less rigging than a dancing octopus swinging from a trapeze while drinking his favorite beverage.
Step 6 – Animation

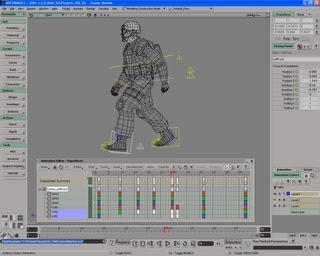
It’s Alive! Now that we’ve built the models and textured and rigged them, it’s time to make them live, breathe, move, and sometimes even speak – whatever the case may be. This might involve one or many models moving independently or in unison. Individual blades of grass in a field might need to wave in a digital breeze while the star of the show is doing it’s own thing in the foreground of the scene. Austin Visuals listens to you to determine just how much Animation is required according to the purpose of the product and the level of realism you desire. The more Animation you need, the more planning and management this step will take.
Step 7 – Lighting

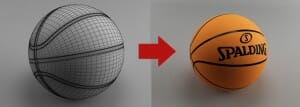
If you’ve ever seen a movie or a photograph (and who hasn’t!), you know how important lighting is to an image, virtual or otherwise. Lighting doesn’t just illuminate your objects and characters, it adds depth and dimension to a scene as well as set a mood or tone for if the intensity, color, and direction are done skillfully. Just as in the movies, lighting can make or break a scene; a poorly lit ball might look like a flat circle, while a properly lit ball can look shiny, life-like, and photo-realistic. Our technicians draw upon their vast experience to use the latest in lighting techniques to give you a product that looks great every time.
Step 8 – Camera Setting

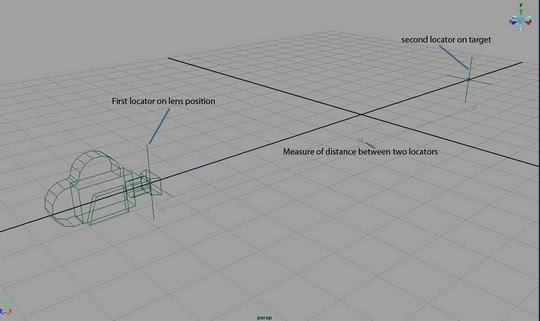
Video cameras in the real world give you the ability to adjust the focus, add depth of field, blur, tracking, panning, etc. 3D Animation doesn’t use real cameras, but relies on many of the same principles for the purpose of capturing a moving image. We use software to do the same things. We’ll move the virtual camera through your three dimensional animated scene and make the desired adjustments to give you exactly the view and effect you want.
But why limit ourselves to replicating what a real camera can do? 3D Animation allows us to easily show things that a real camera can’t. We can look inside a machine to see what’s happening under the hood. We can zoom into microscopic details of just about anything in a 3D environment. Let your imagination run free. We often let you be the director, while our technicians bring your images to life.
Step 9 – Rendering

We’re almost done! Rendering is the last step of the Animation process, but not the final step in your production. This is where we add things like reflections, shading, and shadows. Images in the computer graphics world usually exist as a low quality draft so that artists can quickly manipulate and make changes to their 3D environments. In order to take this draft from its rough low quality state to it a final image that has shadows, reflections, and lots of other detail, we must go through a process called ‘Rendering’. Rendering is the process of taking a computer graphics image from draft quality to a final production-ready look.
Rendering is a very complicated process that requires an amazing understanding of the properties of light and materials in order to achieve the most natural results. The Computer rendering process is also very demanding on computer resources. Sometimes it takes computers anywhere from 5 seconds to 1 day just to render 1 single image. If we are talking about creating an animation which is 24 frames a second. For example if we were to render a 1 minute 3D Animation on 1 computer at 24 frames a second it would take 480 hours to render or day 20 days to put it another way. ( 24 frames per sec * 60 secs * 20 second render per frame = 28800 secs = 480hrs = 20 days ) Therefore; in order to create your 2D or 3D Animation in less than a month, we need some really powerful computers running 24/7 for certain. Since animation rendering does take so long at this point, make sure all the changes your want are done in earlier phases or you may be waiting around for an update for a long time here.
Step 10 – Compositing and Special Effects

Okay! Congratulations! Your 3D Animation Visuals are complete! Now it’s time for post-production, or compositing. Compositing is basically what the film industry refers to as “Visual Effects”. In this step, we edit the rendering, do touch-ups, add effects like explosions or morphing , and even combine real footage with your digital production. In other words, we make a composite of your rendering with additional footage and features.
Compositing can add a huge amount of depth to your production when it’s called for. Explosions without fire and smoke just aren’t the same without it! Effects such as this aren’t modeled as people and objects are in the earlier stages. They’re added in this step through the magic of computer software. Just as in rendering, compositing takes many forms and it can require many different techniques to achieve the results you want.
Step 11- Music and Foley
This is where we get to make your production a truly magical experience. Have you ever noticed how important the music and sound effects are to a movie? Well, they’re just as important to your Animation!
I know we talked about them way back in Steps 1 and 2, Project Definition and Storyboarding, but now it’s time to add the music and sound effects (“Foley”) to tie everything together with the moods and emotions you want to evoke. Your soundtrack is key, and while it may not become a best-seller on iTunes, you’ll need it in order to make your 3D Animation a really satisfying experience, regardless of whether its for entertainment or giving a virtual tour of a proposed building.
Our wizards at Austin Visuals 3D Animation Studio will help you select and create the sounds that will add another important dimension to your 3D Animation.
Step 12 – Editing and Final Output
Now we’re in the cutting room! Here’s where you get to indulge your inner Spielberg and turn all of this hard work into a finished 3D Animation.
Together, you and the fantastic team at Austin Visuals will review the complete Animation and add or delete scenes and effects to create the finished product – if any of that needs to be done. We’ll proof the product with you, review it with your stakeholders, and deliver it in the format(s) you require.
The 2D Animation Process
The first step in the 2D Animation Process is much the same as for 3D. First, we collect as much information as possible from the customer. We’ll ask for reference examples such as images, sketches, or videos that will help us to understand what you want to create. This can include images from Google, videos from YouTube, or other reference material. After gathering the information and references you provide, we’ll create drawings and illustrations based on your ideas of the setting or environment of the animation. We will also create any characters and variations of those characters you might want so that you can choose the options you think are best for your project. Since we’re only working in two dimensions, there are limitations to how realistic these drawings can look. We can still add a lot of detail, but depth and volume cannot be displayed in a realistic manner since our virtual “camera” can only move in a single plane.
In 2D Animation, we still build the elements in phases and in layers. For example, a cartoon character can be developed first, and the background developed and added later. And as in 3D Animation, we actually create a series of individual images that are shown in rapid succession to make characters and objects “move”. Since we’re skipping some 3D steps and simplifying others, we can create sensational 2D Animations more quickly, but with less realism. This might be the perfect fit for your needs, though!
Creating 3D Architectural Images & 3D Renderings

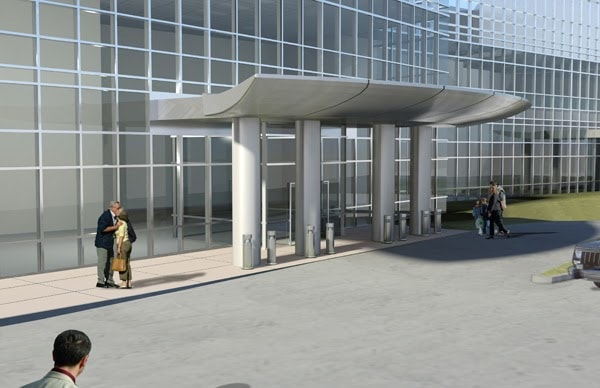
As in our other processes, our first step is to gather as much information as we can about the subject of the rendering, including photographs and blueprints if they are available. We’ll ask you where the camera should be placed and whether this a ¾ view, ground level, bird’s eye, or top down. Once we get these details nailed down, our team of artists will create the general layout of where the objects in the image will be placed. We’ll break your project down into a list of elements that will compose the image and get started on creating them. We usually create the elements with 3D software, even though the final rendering will be a two-dimensional image. We’ll apply “lighting” and texts, and then finally render the completed image as an 11″ x 17″ print. At the end of the process, you will have an image that can be printed on a billboard, mounted on a foam board, or used on brochures, flyers, or banners.
Creating Architectural 3D Animations

The first steps to creating an architectural Animation are the same as those for creating an architectural still rendering. In this case, though, we’ll be giving a virtual tour, so we’ll also need to determine the length of the Animation and everything it will illustrate. Each of our steps for 3D Animation will apply here. Think of this as an “upgrade” of your architectural rendering to provide a more realistic tour of your structure, park, or plant.
In the case of an aerial view of a plant, house, or condo, we might start with aerial photographs as the basis for building the elements of the final product. These may have been taken with a 2D rendering in mind and they will be incomplete for the purposes of 3D, so our team will have to “fill in the blanks” based on the rendering. From there, we can help you to “fly” through a window or door and take a look around the interior space. We will create the most accurate view possible, even down to the smallest details, even if the building doesn’t exist yet. Your architects and engineers will be a crucial to this part of the process. We’ll typically spend more time on the details in the foreground of the scene than the background, but the ultimate goal is to give you the degree of realism you need.
Creating Web Commercials/Mobile Videos/Instructional Videos
So let’s say you want to show how something works, perhaps a new invention, an explainer video for a new mobile website, or an instructional training video for your employees, or maybe you want to create a commercial? How would we go about that? Well, here’s how!
Just as before, our team at Austin Visuals will gather all the information you can provide about what you need. This might include diagrams, screen shots, photographs, and anything else that will help us to create your Animation. We like to get examples of commercials you like if that’s what you’re doing. Anything that can give us a better feel for what the finished product should be like.
From there, we’ll put all your thoughts together and develop a preliminary script for the presentation based on those ideas. We’ll go through revisions of the script with you to get to a final version. Then at this point we can start building a 1st draft animation around the script you provide. We help you to find the right voice actors to convey the feel you want for the piece, whether it’s formal and business-like or cute and fun. We’ll then develop characters that best depict the dialog and voices. Our team will create concept sketches of the characters and refine them from there.
Now on to storyboards or to put it another way, the “blueprint” for making your commercial or instructional video. We’ll work from the storyboards and make a rough draft for you to review, complete with voice-overs or dialog. At this point, the visuals might not be what you’re looking for in the final product, and they may just look like pencil sketches, but the key here is getting the timing of the action right, syncing the soundtrack with the visuals, and making sure that the overall effect will be on target.
This is a key phase in the process, and we’ll all work together to decide what adjustments to make. With those in mind, we’ll make the final changes and edits and put it all together into your finished product. The product will be delivered in the formats of your choice for web, DVD, or other distribution methods, including mobile phones.
Thank you for your time and we hope you’ve enjoyed this educational walk through of Animation Process at our Studio.
As you can see, Austin Visuals exists to turn your vision into Animation reality. 2D or 3D, we can do it all! Call us today ( 512-591-8024 ) to discuss your Animation needs and you can also contact us by completing an online request for quote
Thank You for choosing Austin Visuals as your Animation Industry professionals.
