How 2D and 3D Animation is made at an Animation Studio – Part 4
Our Team at Austin Visuals 3D Animation Studio feels it is very important to educate the community, clients, and anyone that is curious about how Animation is made or over what exactly goes on behind the scenes in a 3D or 2D Animated Production. This knowledge will not only explain how we do what we do, but it also helps everyone appreciate the service we provide, helps people better collaborate with us, and helps us manage people’s expectations throughout the 3D or 2D Animation process.
There are some people that watch Animated cartoons on TV or see the 3D hit movie Avatar and enjoy it but have no idea how many steps, it takes, who does it, how many people does it take, who are the people that make it, or what’s involved in the process. As Animators, we can often forget that the general public doesn’t have a degree in Animation like most of us working at Studios do, so we feel it’s time to shed some light on the subject and educate as well as entertain you about what it takes to create a 2D or 3D Animation at a Studio. This will be Part 4 of a series we will create on this subject, so stay tuned for all of the series. We will be walking you through step by step in a rare behind the scenes look at what it takes us to build those Film FX, Cartoons, Commercials, and anything Animated you may have seen around. Enjoy.
As one of Austin, TX’s Premier 3D Animation Companies, we serve our clients locally and globally. Established in 2007, Austin Visuals has produced many Animated Commercials, Cartoons for YouTube, Architectural Animation, Visualizations for the Oil and Gas Industry, Animation for The University of Texas (UT, Austin, TX), and even Animation and Graphics for NASA.
Here are some of the topics we will be covering in this series.
Step 2: Concept and Storyboards
Step 3: 3D Modeling
Step 4: Texturing
Step 5: Rigging ( <—Covered in this Article )
Step 6: Animation ( <—Covered in this Article )
Step 7: Lighting ( <—Covered in this Article )
Step 8: Camera Setting ( <—Covered in this Article )
And more…
( Continued…)
Step 5 – Rigging
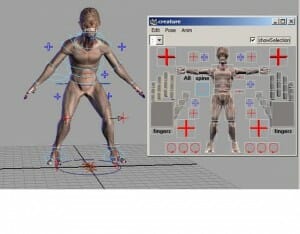
Rigging is the last step before Animation. Each rigging is unique to each object in your production. Our team of animators will digitally manipulate the skeleton depending on the the desired motion. Obviously, the more complicated the motions are, the more complicated the rigging will be and the longer it will take to animate. For example, hands moving on the face of a clock or a car sliding through an intersection will require considerably less rigging than a dancing octopus swinging from a trapeze while drinking his favorite beverage.
Step 6 – Animation
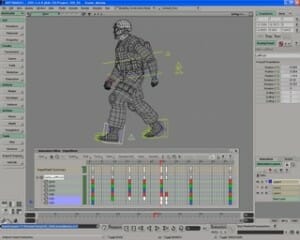
It’s Alive! Now that we’ve built the models and textured and rigged them, it’s time to make them live, breathe, move, and sometimes even speak – whatever the case may be. This might involve one or many models moving independently or in unison. Individual blades of grass in a field might need to wave in a digital breeze while the star of the show is doing it’s own thing in the foreground of the scene. Austin Visuals listens to you to determine just how much Animation is required according to the purpose of the product and the level of realism you desire. The more Animation you need, the more planning and management this step will take.
Step 7 – Lighting
If you’ve ever seen a movie or a photograph (and who hasn’t!), you know how important lighting is to an image, virtual or otherwise. Lighting doesn’t just illuminate your objects and characters, it adds depth and dimension to a scene as well as set a mood or tone for if the intensity, color, and direction are done skillfully. Just as in the movies, lighting can make or break a scene; a poorly lit ball might look like a flat circle, while a properly lit ball can look shiny, life-like, and photo-realistic. Our technicians draw upon their vast experience to use the latest in lighting techniques to give you a product that looks great every time.
Step 8 – Camera Setting
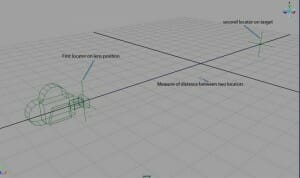
Video cameras in the real world give you the ability to adjust the focus, add depth of field, blur, tracking, panning, etc. 3D Animation doesn’t use real cameras, but relies on many of the same principles for the purpose of capturing a moving image. We use software to do the same things. We’ll move the virtual camera through your three dimensional animated scene and make the desired adjustments to give you exactly the view and effect you want.
But why limit ourselves to replicating what a real camera can do? 3D Animation allows us to easily show things that a real camera can’t. We can look inside a machine to see what’s happening under the hood. We can zoom into microscopic details of just about anything in a 3D environment. Let your imagination run free. We often let you be the director, while our technicians bring your images to life.
Don’t worry if this is your first Animation project, we know the kinds of questions to ask at this step to ensure that your production is a Blockbuster! That’s all for now, join us next time for another post in our series. To find all the posts, visit our blog at Austin Visuals
At Austin Visuals 3D Animation Studio we specialize in providing the following 3D Animation and Video Services:
- 3D Animation, FX, and 3D Renderings
- Animation, Video Production, and Graphics from concept-to-completion
Contact us at Austin Visuals if you need help structuring your 3d animation needs, and we can help you save time and many headaches of getting your project off the ground and best of all we bring your ideas to life.
